How quickly and easily to create a high-quality and reliable GPS route?
In this HOWTO we will create a GPS track with RideWithGPS.com and via Garmin Connect we will send the GPS track to our Garmin Edge 540.
The procedure is absolutely the same for all other bicycle computers from the Garmin Edge series.
You can use the HOWTO also for all other bicycle computers like Wahoo, Hammerhead and all others.
High-quality GPS track with RideWithGPS
One of the main and most important elements in planning for a long bike ride or a permanent brevet on new and unfamiliar roads is creating a high-quality GPS track.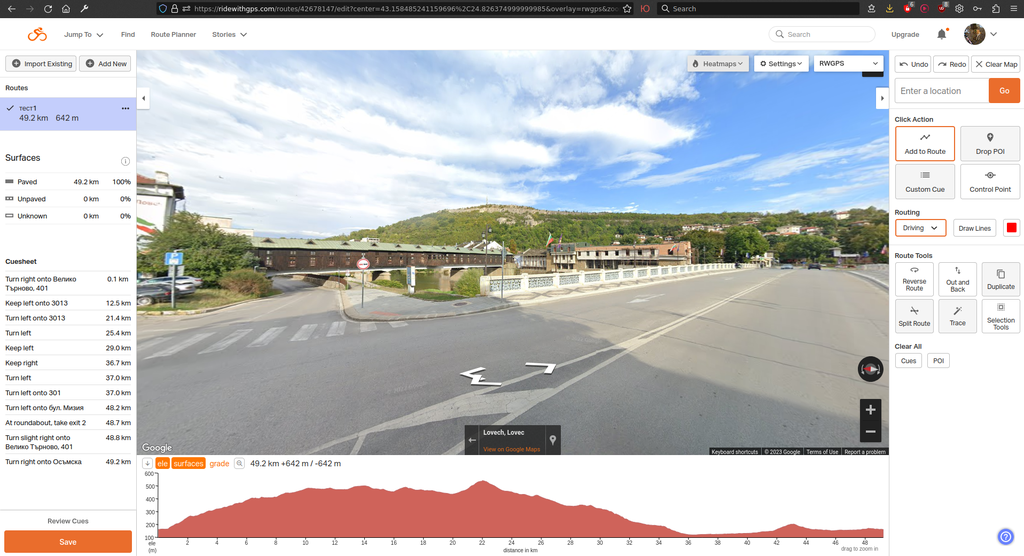
If the GPS track is not properly surveyed, carefully checked, and well-made, it poses many potential risks during the ride.
For example, during a long and complicated ride on an unfamiliar route with a road bike, if the track takes you through various "goat paths" at some point, you will waste a lot of unnecessary time, nerves, and energy in detours.
On the other hand, if you insist on continuing with your road bike on "goat paths," you risk damaging your bike or other equipment parts.
In my opinion, the highest quality platform for creating GPS routes is RideWithGPS.com.
These are my conclusions based on my personal experience creating dozens and hundreds of GPS routes not only for permanent brevets across the country but also for regular long rides over the past few years.
Yes, there are MANY different websites offering various options for creating GPS routes such as Komoot.com, Garmin Connect, Strava.com, Openrunner.com, Google Maps, and many others!
 But none of them (in my opinion) can compare to the quality and features offered by RideWithGPS.com.
Unfortunately, Garmin Connect offers an extremely clunky and difficult-to-use interface, and after the last update to the Garmin Connect interface, things got even worse... :(
To use RideWithGPS.com, you need to create a free account.
RideWithGPS offers some of its tools only in a paid subscription, BUT the most valuable thing is that with the features of the free account, you can work 100% fully and quickly and easily create a QUALITY GPS track!
If I ever decide (or am forced) to pay for a subscription on any of the sites mentioned above, I would easily and without hesitation only pay for a subscription on RideWithGPS! :)
RideWithGPS Route Planner
So now we have a free registration with RideWithGPS.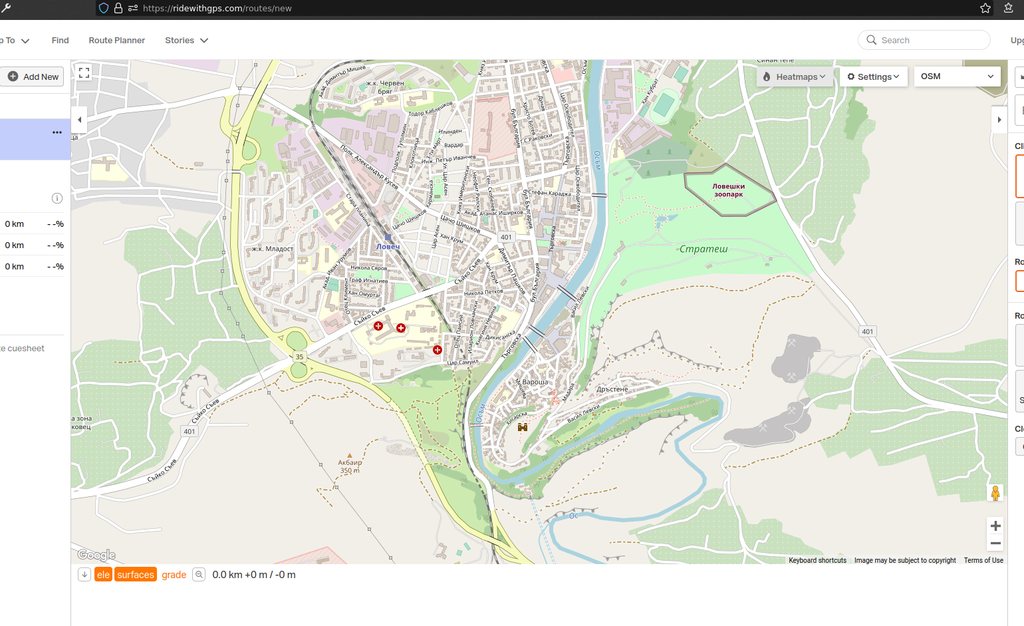
From the menu at the top left, select Route Planner.
Map selection
The next important step is to choose on which map we will create our new GPS track.
By default, the site offers the RWGPS map, but this map is NOT as good!
When drawing a track for a permanent brevet, I explicitly choose the OSM - Open Street Map.
 With the OSM map, the roads are most accurately made for easy GPS route drawing on highways.
I have had cases with some of the other maps (Google Map / Terrain, RWGPS) for some unclear reasons, if I am on one of these maps, the site does not allow me to draw the track on the road I know is OK, while with the OSM map I have NOT noticed such anomalies.
From the menu at the top right, in 90% of the cases when drawing a road bike route, it is best to choose the OSM (Open Street Map).
If we are creating a route for gravel or MTB, things are different and then probably the OSM Cycle map is the right choice... :)
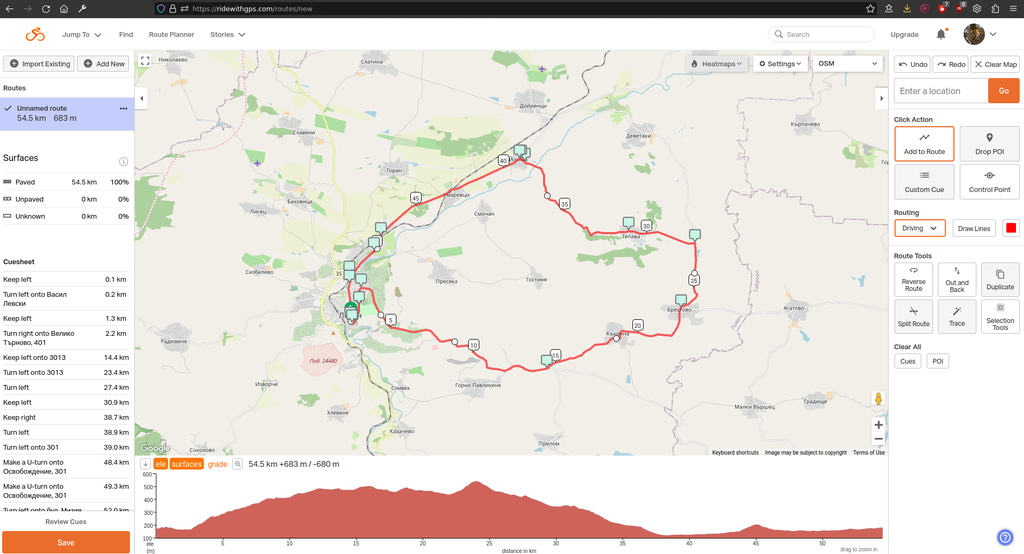
![Screenshot from 2023 04 24 17 43 57]() Creating a GPS route
Creating a GPS route
After we have selected the OSM map, we start drawing by clicking with the mouse on the spot on the map where we start the GPS track.
Then we continue to click on the roads through which we want to pass.
If in some section of the route it goes not on the road we want, then with the left button of the mouse, we click on the incorrectly drawn section, hold down the button and drag the mouse to correct the route.
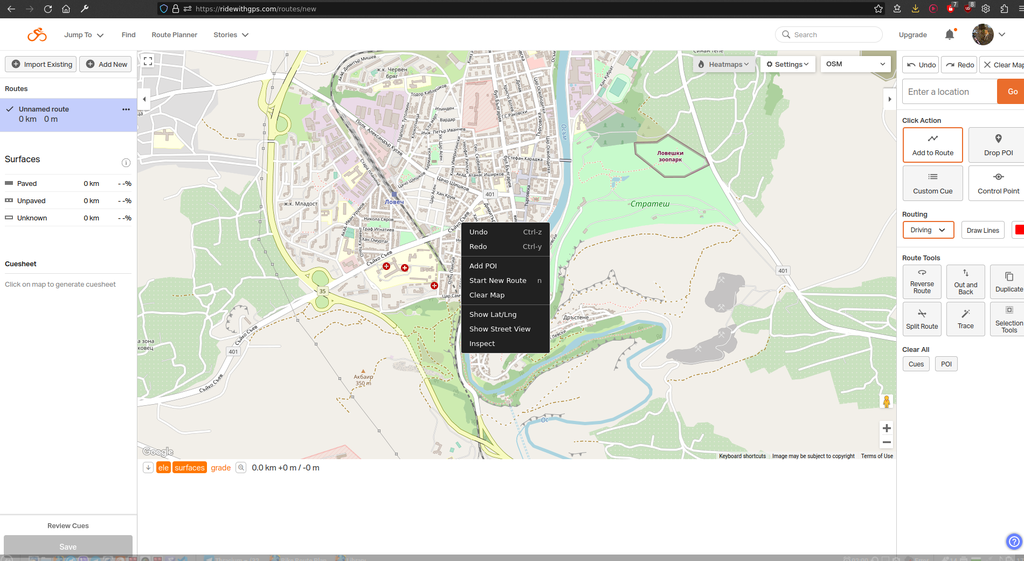
Checking an unknown road section in Google Street View.
When you are creating a route in an unfamiliar area and wondering if a certain section is passable and what the quality of the asphalt is, you can right-click on the location and select "Show Street View" from the menu.
This way, you can view the road in the latest version of Google Street View that was captured in that section of the road in Google Street View.
This is an extremely valuable option! !!! :)
Choosing the transportation mode
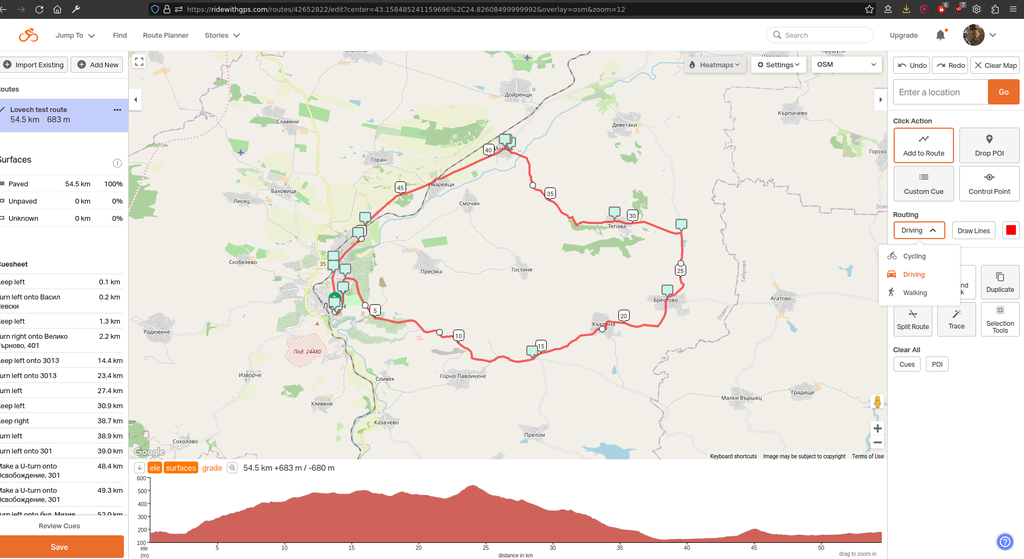 Choosing the right mode of transportation for which the route is plotted is extremely important.
The options are Driving (car) / Cycling (bicycle) / Walking (pedestrian).
The mode of transportation is selected from the menu in the middle on the right.
For permanent brevets and road cycling routes, 90% of the time I work in Driving mode (car).
Therefore, I only use one of the other two modes, Cycling (bicycle) / Walking (pedestrian), when the route needs to pass through a street closed to cars or, for example, cross the pedestrian center of a city.
If, however, we create an MTB or gravel route, things are fundamentally different.
Then, we will probably get the best results with the OSM Cycle map and choose Cycling as the means of transport!
Honestly, I mainly create routes for permanent brevets ridden with a road or gravel bike... :) ;) :)
GPS track recording.
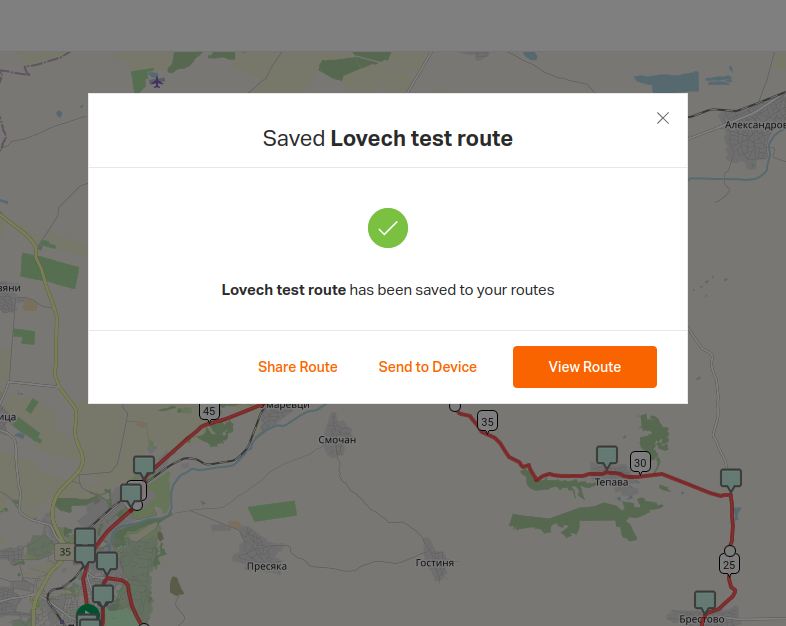
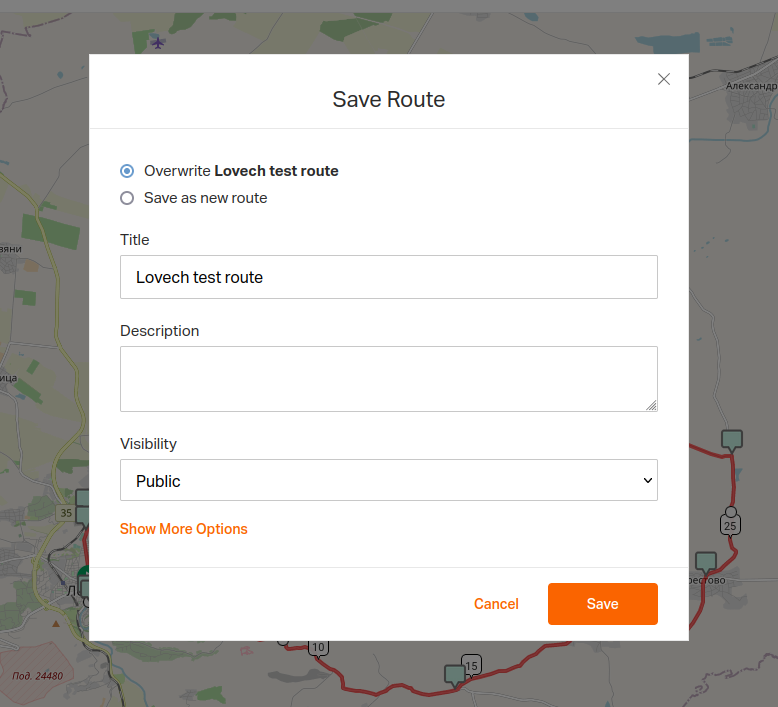 After we have outlined the entire route, it's time to save the created route.
The track is recorded from the orange button at the bottom left Save.
A new window appears where you give the route a name under the Title: line and save it to your GPS track list using the Save button.
Done! :) The track is created and saved.
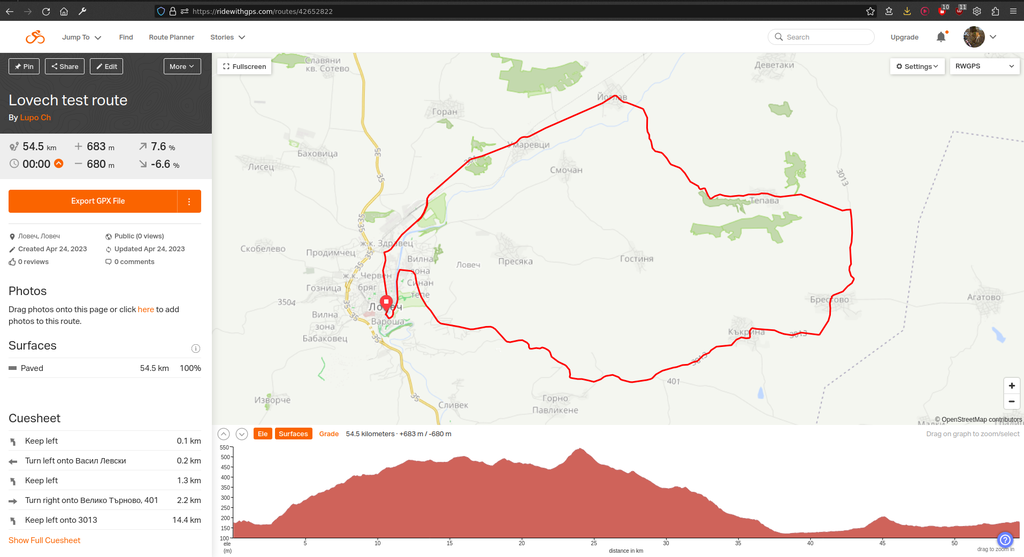
Viewing the GPS route.
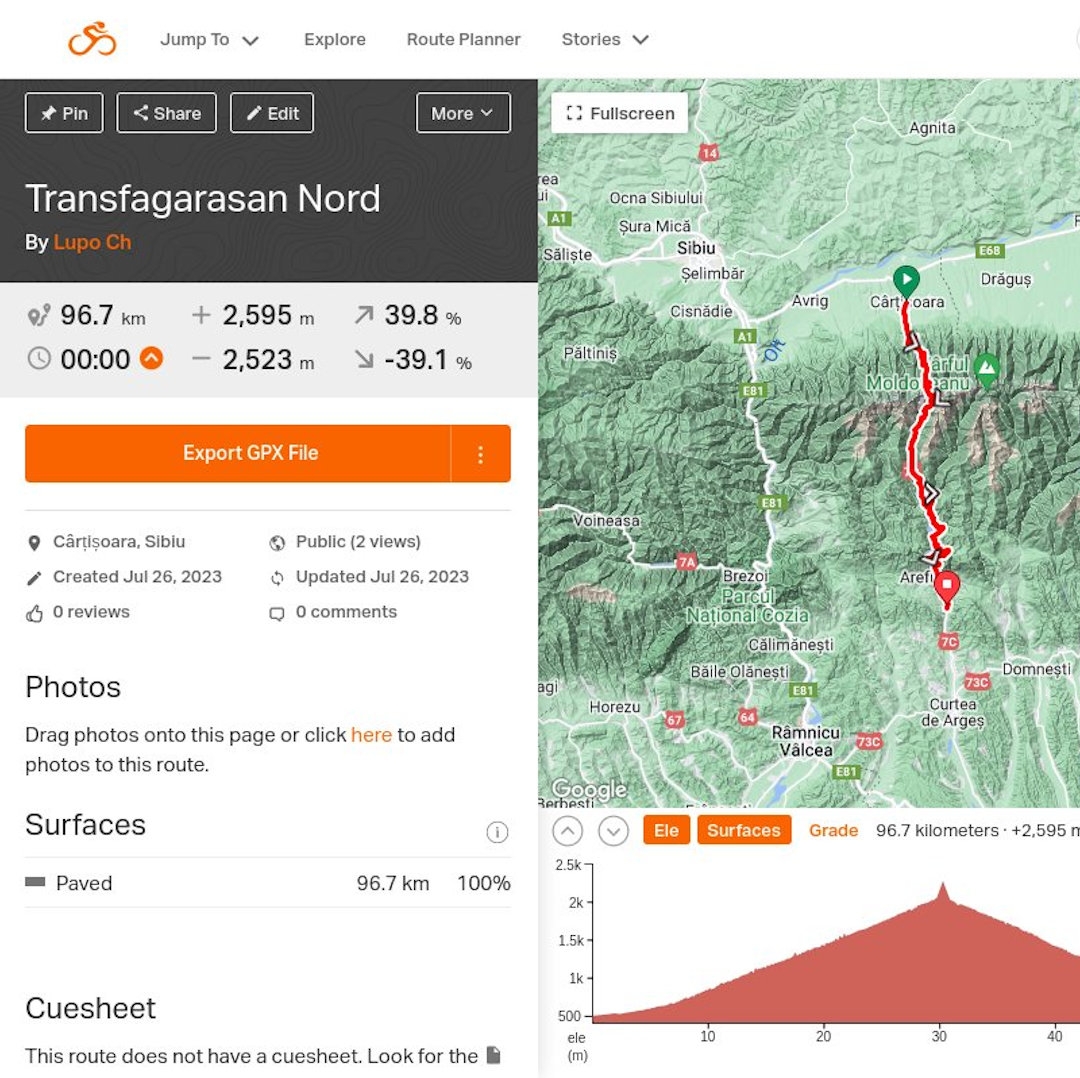
 You can view the created GPS route by clicking on the View Route button.
In general, the recorded GPS route can be viewed through the menu at the top left: Jump to / Routes
If you want to make changes to the route, use the Edit button at the top right.
Exporting the created GPX file.
 If everything with the GPS route is fine, we need to export it from the website to our computer and then save it either on our Garmin/Wahoo/Bryton/Hammerhead bike computer or directly on our smartphone.
By clicking the Export GPX File button, we export and save the file with the created GPS route in GPX format on our computer.
The newly created file has a .gpx extension.
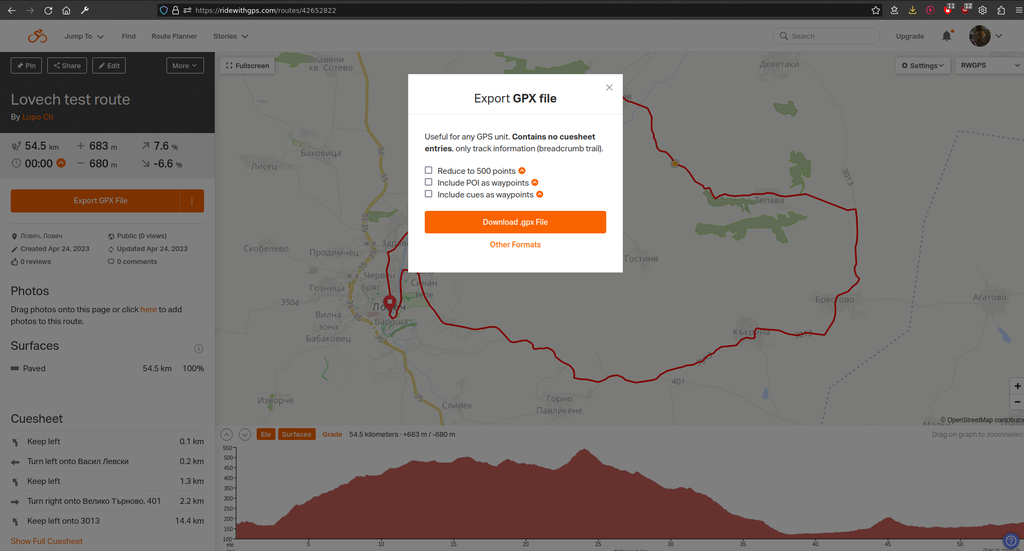 We save the GPX file in a folder on our computer and then we will transfer it directly to our Garmin Edge / Wahoo / Bryton / Hammerhead bike computer from there.
Personally, I use Garmin Edge 540, so here I will continue with instructions on how to exactly transfer the newly created GPX file with the newly created route to the bike computer.
This can be done in two ways:
We can directly copy the file to the memory card of our Garmin Edge or
We can import the file as a new route in Garmin Connect and send the route from there to Garmin Edge.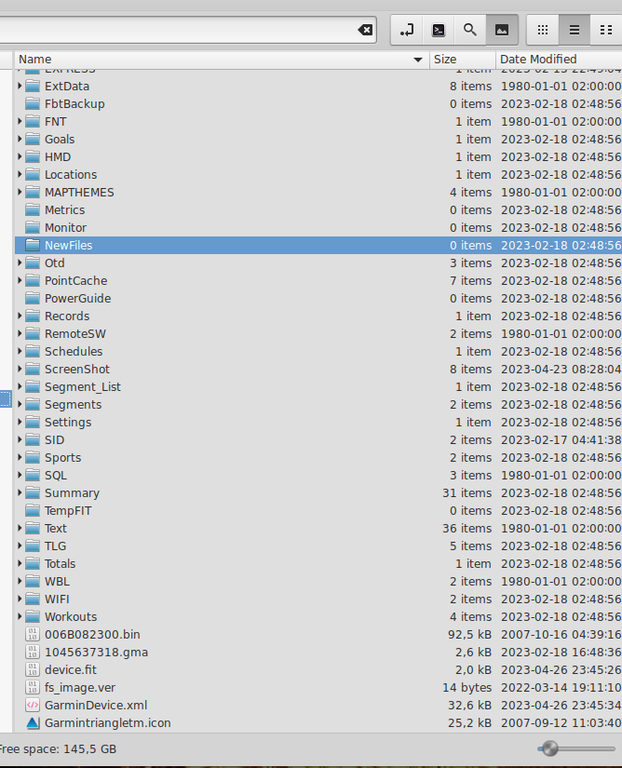
Copying the GPX file to the memory card of Garmin Edge
We connect our Garmin Edge to the computer via USB cable.
We go to the Garmin folder and copy the .gpx file of the route into the NewFiles folder.
We "eject" our Garmin by right-clicking and selecting Eject to ensure that the device is safely disconnected.
Once the Garmin Edge loads the newly created route, it will be waiting for us in the Courses submenu.
Importing into Garmin Connect.![Screenshot from 2023 04 24 18 00 23]()
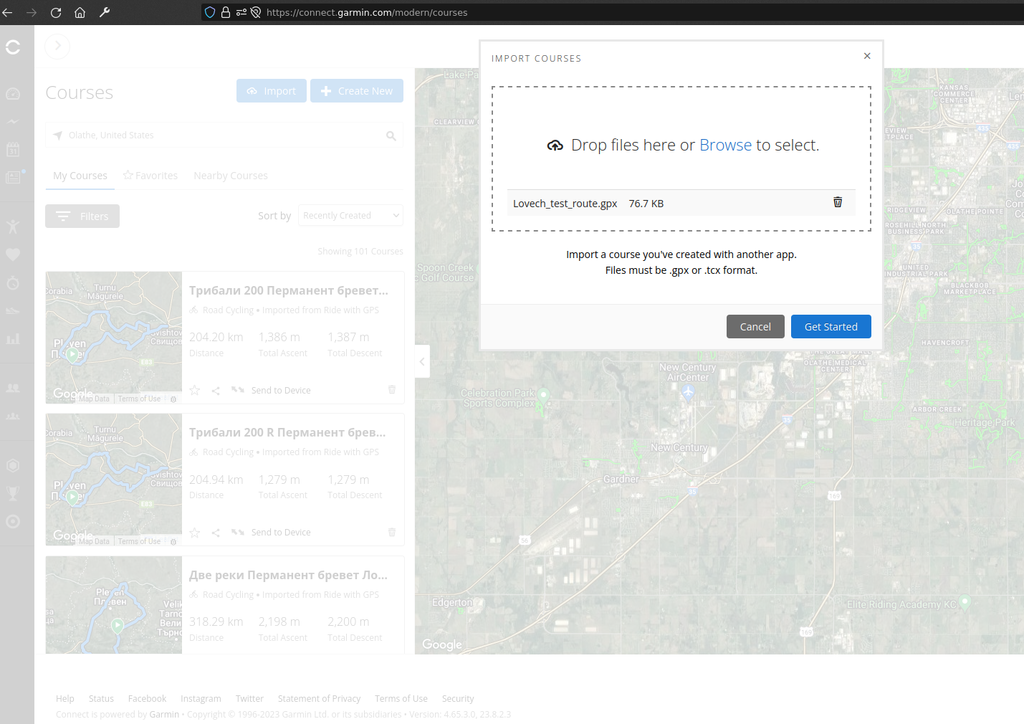
On the computer browser, we go to Garmin Connect at the address https://connect.garmin.com
From the left menu, we select Training & Planning / Courses.
Then, through Import / Browse, we choose the route file from our computer in Garmin Connect.
Next, we press the Get Started button and choose Road Cycling or another available type.
In the Course Name field, we give a name to the route and finally save the route in Garmin Connect by clicking the Save/Done button.
Finally, we send it to our bike computer via the Send to Device button in the bottom left corner.
After synchronizing our Garmin Edge with Garmin Connect, the newly created route will be waiting for us in the Courses submenu.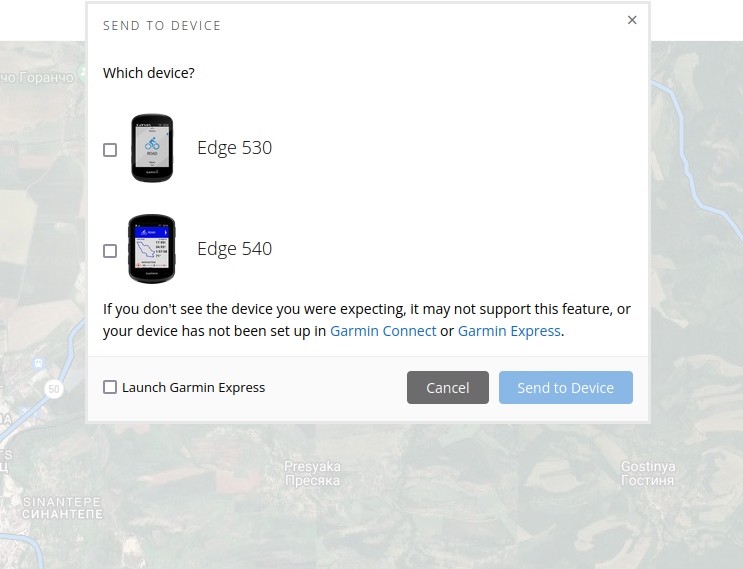
That is it! :)
Good Luck!